This past summer, I worked as hard on my art efforts as I ever have. I was making pinhole photos almost daily. And when you work full time in your day job, it takes some energy to put in those extra hours each day or at least each week. But, it seemed that no matter how hard I worked at it, I just never achieved what I was after.
The images I spent the most time on were the solar prints. These are images made by exposing black and white photographic paper to the sun for a long period of time. I got excited about the possibilities for this after setting out a couple of cameras for Tarja Trygg, for her Global Photographic Project of Solargraphy. Even though I never quite got what I was hoping for with these images, I still find the process interesting and decided to post them here as sketches or ideas to return to on another time perhaps.
Some Solarprint Images
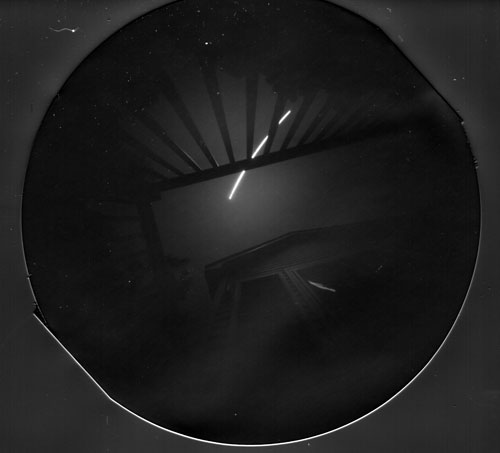
I took this one in June, they day I learned about Tarja’s project. This was a test of the cameras I made for Tarja, and also to see how the solar print stuff works. I wasn’t sure about how to process the paper, so I just put it in some fixer. The negative actually has color in it, but I removed the color from this scan. This was about a 4 hour exposure of the sun in a 4 inch round tin pinhole camera. I was impressed that one could make an image this way.
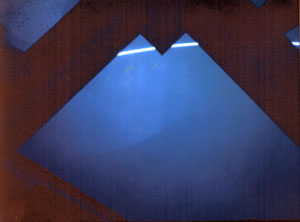
I like the color in this one. The red area in the print was actually a bright white railing. The colors in the black and white paper look like color reversal film, and sure enough, if you reverse them in Photoshop, they turn out close to natural color (at least the sky is blue!).

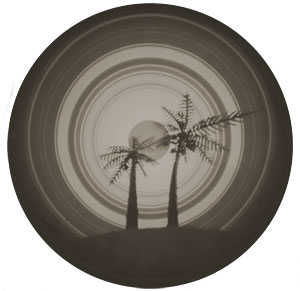
I began pulling in my arsenal of props, and hiked over to a nearby sand dune to set out cameras for 1-4 day exposures every few days. This was a one-day exposure with a plastic bag around a tiny palm tree.

Here I placed a round tin camera on a turntable for the day. Looks like a geometry project or something. Not what I had in mind, if I had anything in mind.
This is one of the last solar prints I made. This one was also wrapped in plastic wrap – that’s why the sun has streaks coming out from it. I like that. What’s up with that?
One aspect of doing this is that the paper must be kept dark after it is exposed, just like all photo paper. But, if you “fix” the image in photo fixer, one thing the fixer does is remove most of the image from the paper. Only a faint image remains. The streaks in many of my scans is from my scanner. It might be possible to take a lens photo of the negative – a long exposure in subdued light, and then print that. But I haven’t tried that.
I tried developing the image first, in a very diluted developer. That works to set the image. Then the fixer fixes it normally as any paper print. But, a side effect of this is that the color is completely removed by the developer.
I made about 30 pinhole exposures in all. There’s a lot I like about this process – the texture in the sky and other large areas, the reversed color of the negative, and of course the magic that it even works at all.
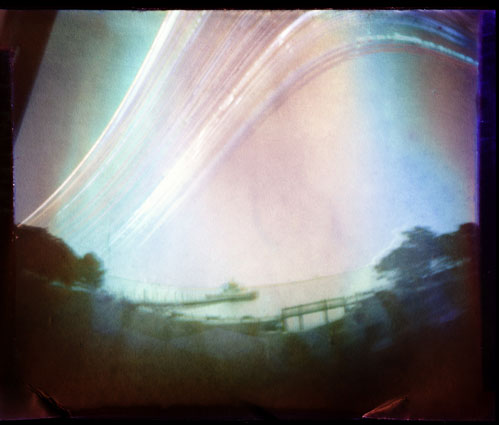
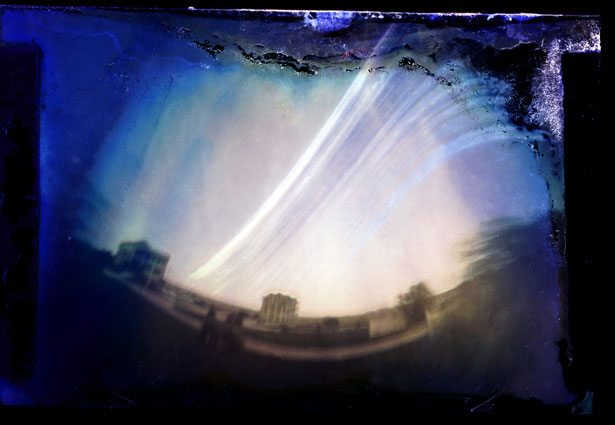
And, last week Tarja returned the scans of the negatives I made for her. These were paper negatives in 35mm film cans, exposed from the summer solstice on June 21 until the Autumn equinox on September 23.
Hi there,
Of course I don’t know what exactly you’re looking for, but I think the last two pictures are marvelous: curious intermingling of cool and dark colours, distortion that serves a purpose…just great!
Wiard
Amsterdam
PS: I’m just starting out with pinhole.